Pages

Thursday, May 2, 2013

Red rice trials!


I've been a hoarder. Always. And that's what happened with food as well, I've been getting fun stuff from various markets to try out at home, but as is evident from the activity (or the lack of it) on this blog, I've hardly done any justice to the lovely ingredients I have been stocking up on.
Today's meal had to be a quick one, and had to be dished out with whatever was available at home. Of course, with a fully stocked Gujarati (or even Indian) kitchen, there would hardly be any problems, yet I wanted something that we do not eat every day. 
A packet of red rice peeped through from underneath the many other packets trying to hide it. I could have made do with a simple dal chawal, but as I mentioned before, nope! So I dug in the fridge - mushrooms and sprouts. The deal was sealed. Mushroom rice with sprouts. Simple. In the end, I thought Chinese flavours would work better, so I threw in a couple of onions as well! Simple and delicious.


Schezuan mushroom red rice with sprouts


Ingredients

Red rice, washed - 1 cup
Spring onions, washed and chopped roughly lengthwise - 1/4 cup
Mushrooms, washed and sliced - 1/2 cup
Bean sprouts - 1/4 cup
Coriander (cilantro), washed, chopped roughtly - 2 tablespoons
Garlic, peeled and sliced - 1or 2 cloves
Salt - 1 teaspoon
Schezuan sauce - 2 table spoons
Soy sauce - 1 teaspoon
Oil to cook (or Pam cooking spray) - 1 teaspoon


Method

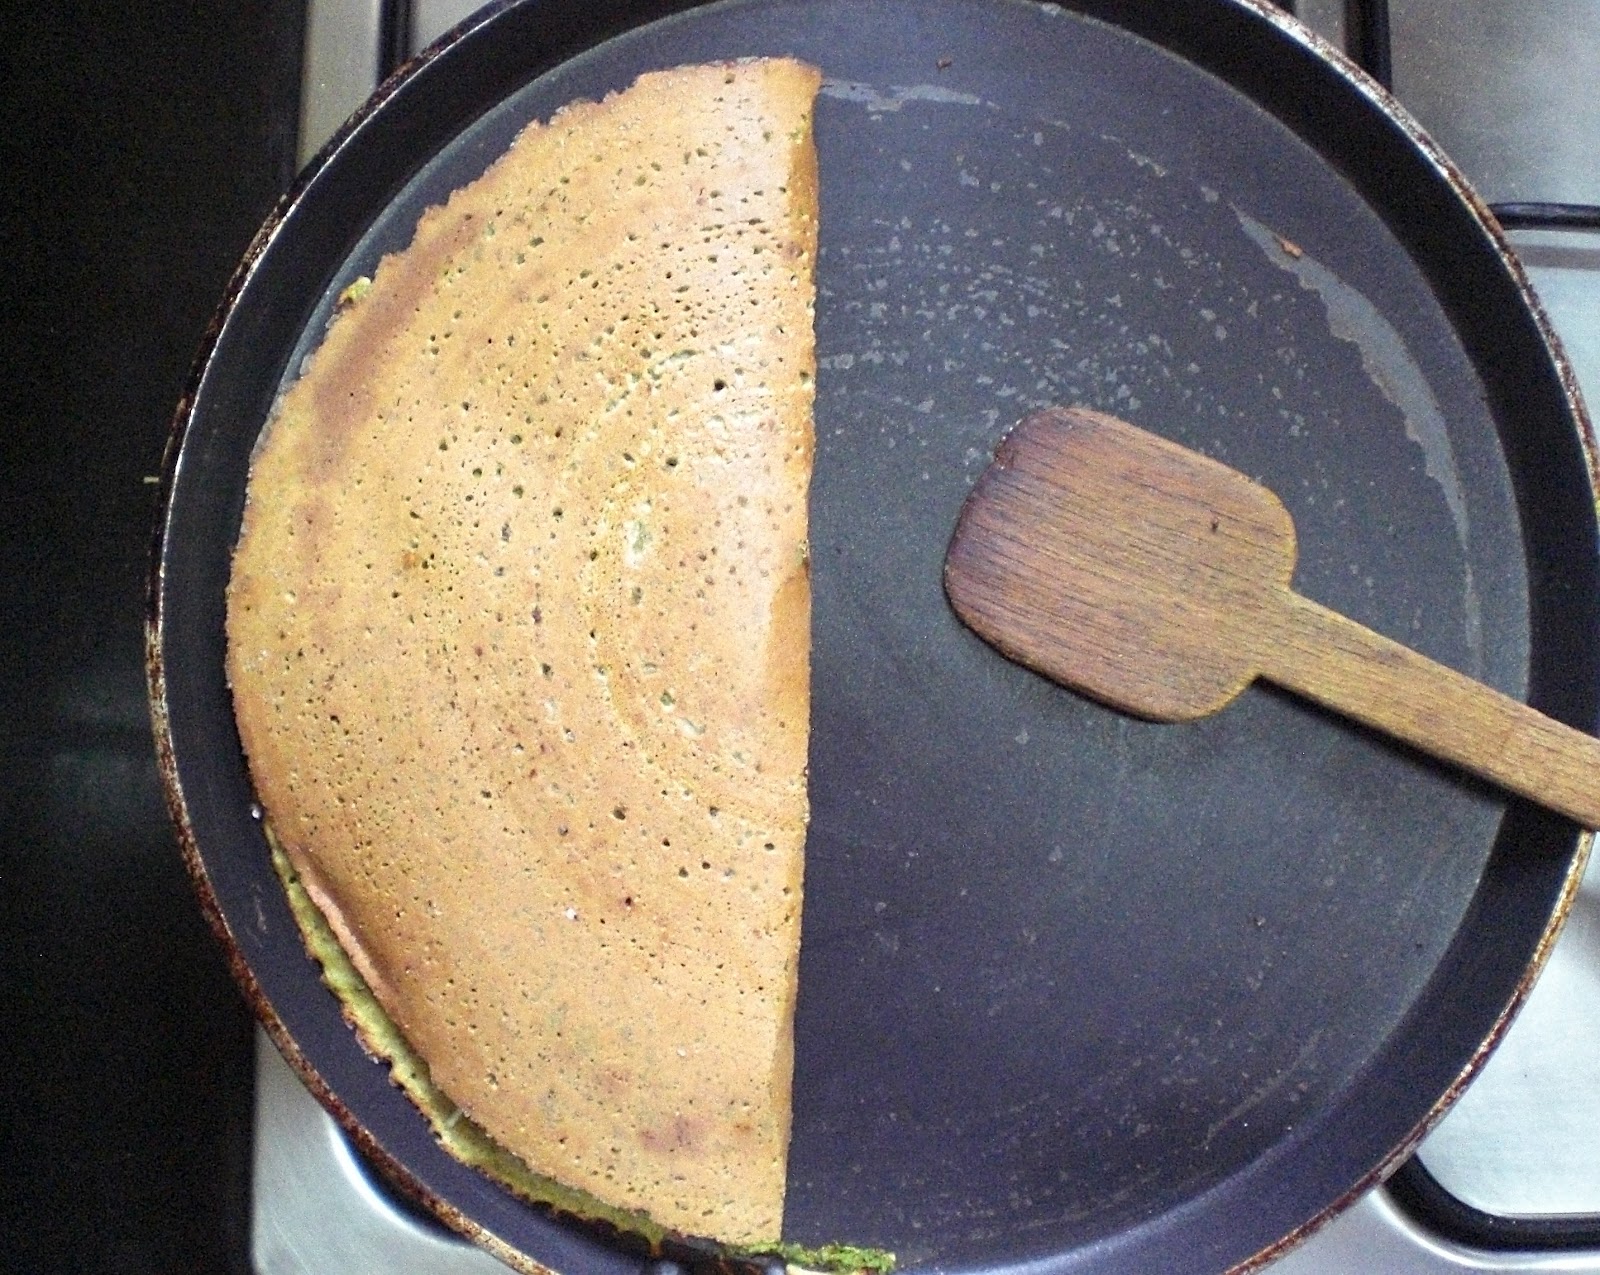
Cooked red rice ready to go in the pan
1. Soak the rice for at least half an hour (or more) and cook till grains are soft. Drain the excess water and allow it to cool and dry. You can wash and chop all the veggies until then.
2. When step 1. is done, heat the oil in a nonstick pan. If using Pam, work accordingly. Saute the garlic and onions for 30 seconds and add the coriander. We are using it as a herb, not a garnish. After a few seconds, add the mushrooms and the beans. Cook only for about a minute till they are lightly done. You do not want to leave it longer, as they will wilt and ooze out liquids. 
3. Add the schezuan sauce. I had bottled some from a recipe (see link above) but you could also use a store bought version.
4. Add the rice and salt and mix well. You do not have to cook any more, you just have to mix well.
5. Add the soy sauce and taste it. Adjust salt if you want.
6. Wait no more, devour it, and wash it down with a cold drink!


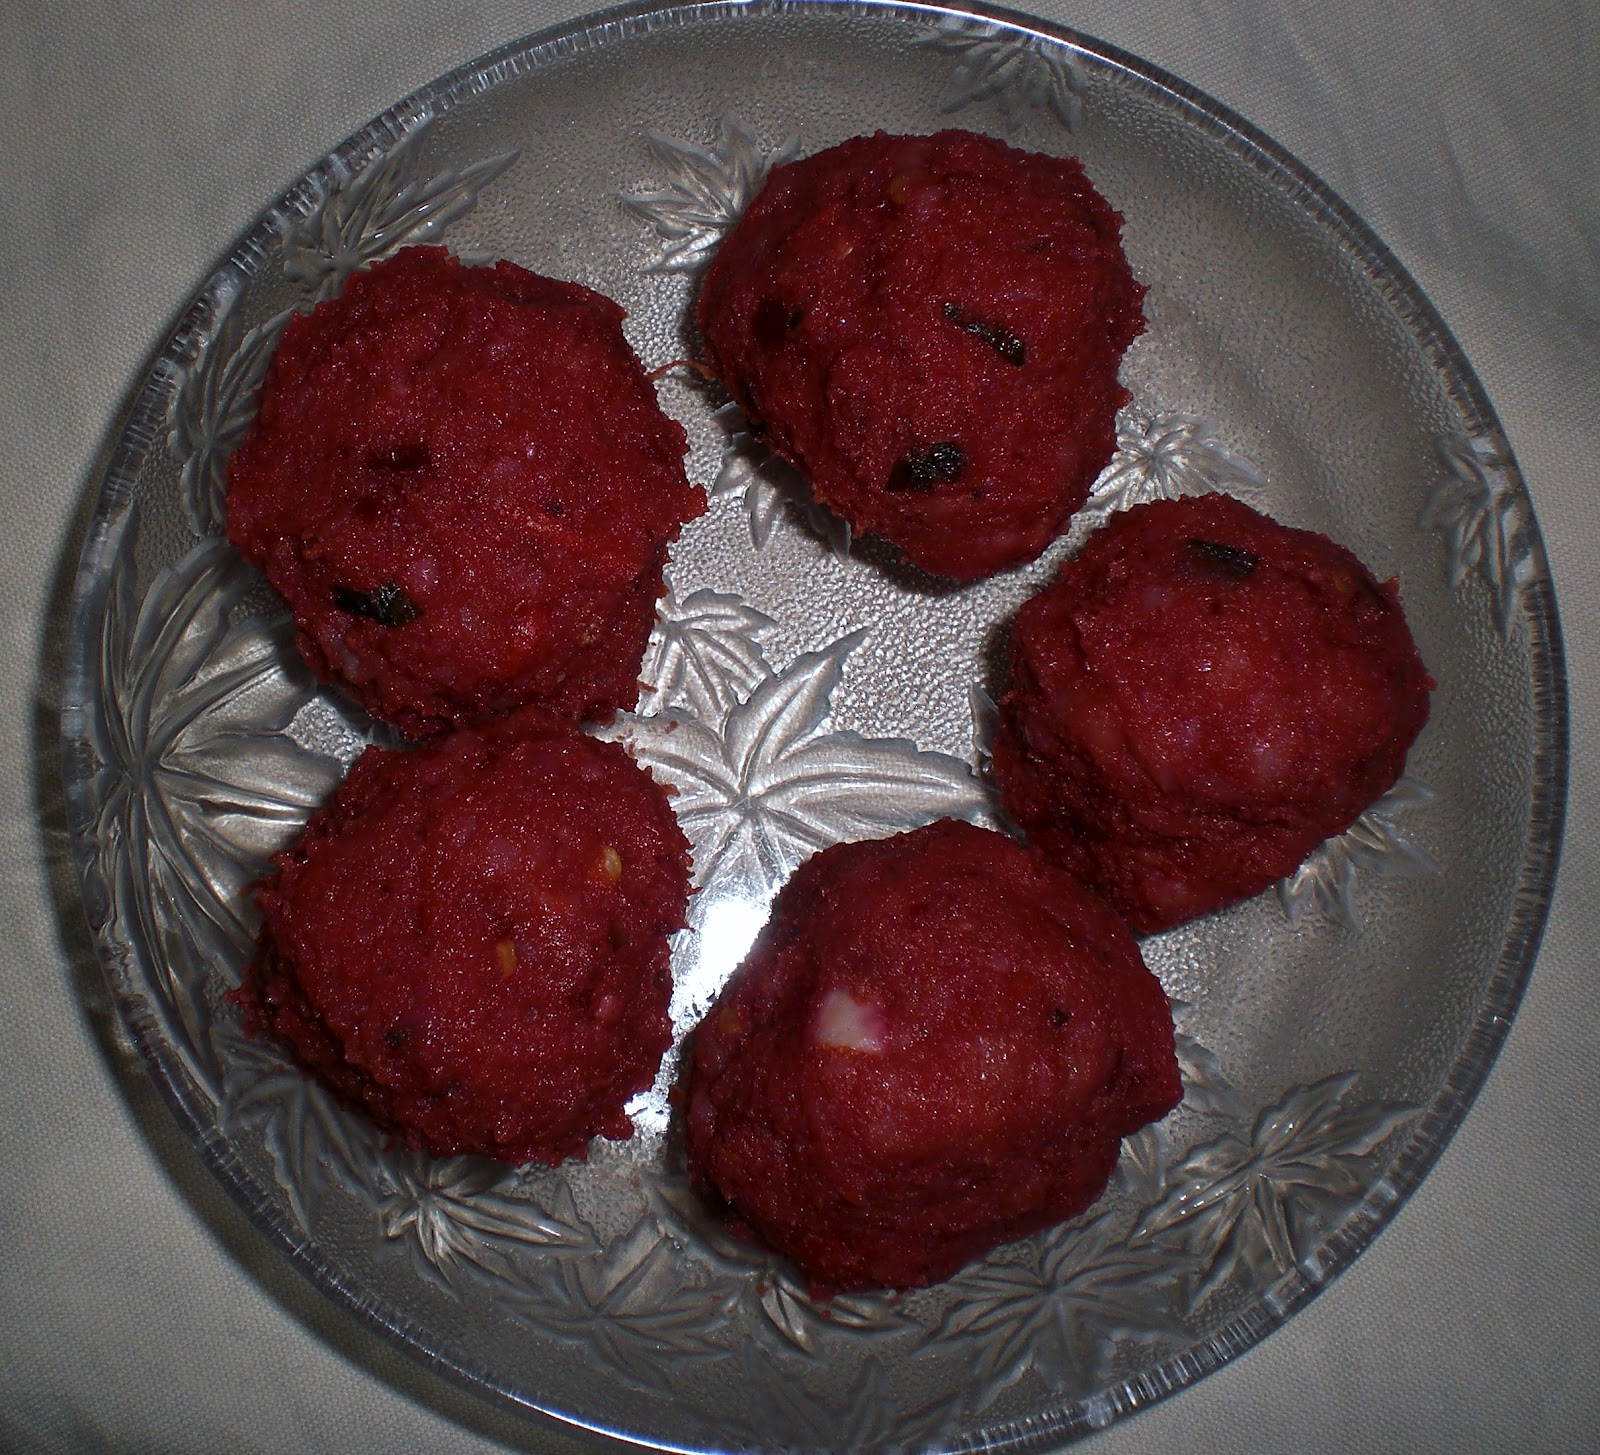
Waiting to be attacked


Notes

  • You could use any kind of rice instead of red. But the crunchier version tastes better than white rice.
  • To increase spice levels, you could add a couple of green or red chillies.
  • No measurements are set in stone, you could alter them to your taste!
  • I used only the while of spring onions, since I had no greens. You can use both, and substitute with a regular onion if you do not have spring onions at home. 


Sunday, July 29, 2012

A La Cart

This is a story that I did for Youth Incorporated magazine for June 2012. Enjoy!

Embarking on a food journey on Indian streets, the writer tries to analyse what makes roadside food off a cart one of the most sought after items on a to-do list

Yummilicious chana chat


Hot off the fryer - samosas!
On a cold winter morning (read negative temperatures) when walking the streets of New York City navigating six inches of snow with each step, while my mouth offered new expletives each time, my mind kept thinking of what I’d give up for just one vada pav or a hot cutting at that point of time! That’s the charm of street food in our country – lip smacking fare available at every corner – hot, fresh and made to order. Despite the questionable hygiene, nay, the complete lack of it, very few of us are able to resist the temptation of biting into a just-off-the-kadhai samosa – a thick, crisp and well salted crust on the outside with one of the most delicious potato and pea concoctions on the inside, dipped into the sweet, sour and spicy chutneys on the side. This riot of flavours in your mouth for under Rs 10!
 

The famous Palitana bhel stall. Photo by Hardik Patel
 Not many countries have such a vast variety of street food to offer to the innocent passer-by who is lured in by the aromas that waft through the dust, dirt, concrete and human pockets. From the chats of Delhi to the special pav bhaji of Mumbai, and the sea food of Goa and jhal muri of Kolkata, even a small town called Palitana in Gujarat is famous the world over for the unique bhel it has to offer! In fact, somehow, even the Maggie made and served by street vendors tends to taste better than the one we make at home. No day of an average Mumbaikar, or for that matter an average urban Indian, is complete without having relished at least one item on the unwritten menus of these small yet curiously utilitarian street carts.
The selling point of the street food carts, besides being quick, affordable and at most times totally mouthwatering, is the fact that they know how to be innovative to please the crowd. This innovation has given birth to some of the most loved dishes of all time – like the Chinese bhel, the chop suey dosa, the samosa sandwich and the Chinese vada pav! In fact, it is quite likely that your neighbourhood tapri will offer you lemon tea without milk or sugar, green tea, masala tea, mint tea, milk tea, not to mention the humble cutting poured out into the special cutting glass out of a battered aluminium kettle.
It’s not only about the variety on the menu, it is also about the way things sell. From full meals to simple snacks and fast refreshers, the street vendors have it all at a go. They do not have to ask for the permission of a manager to make substitutions in food, to hand over two extra bhajiyas in lieu of two bucks change, or to give an extra helping of onions or pickle or any other condiment to the customer. The decision is fast, and timely, and revolves around keeping the customer happy. Sometimes one could wonder that the business skills that life has taught these inventive street cooks-cum-entrepreneurs could be equated to those learnt at B-school. I’m sure they could. And in some cases, the street-smart food guys will emerge on top. Which B-school teaches students to deal with haftas to be given to the local police and goons alike, just for basic survival?


Mumbai's famous - pav bhaji! Photo by Ashish Lakhara

As acclaimed photographer Sephi Bergson, who has been tracking down the best street food in the country, combining the vibrant and colours and mouthwatering sights in the pictures, puts in her book Street Food of India, “From the teeming lanes of Old Delhi to the hot, dusty streets in the remote countryside, it is painfully hard to resist the smells and sights and tastes of this roadside food, prepared in front of customers’ eyes with the freshest ingredients and a good helping of panache and showmanship.”
A lot has been written about these innovative entrepreneurs, special cook books have been devoted to them, and every home cook has tried to replicate the tastes in a clean home kitchen. To the despair of those digging into the fare, even the most able cooks have failed to produce the dishes that match up. The taste, as many say, lies in the huge amount of effort that the roadside cooks put in to feed an army of people day in and day out, coupled with the survival instincts needed to combat competition, to stay clear of the local ‘dons’ and the hawaldars, and last but not the least, the sultry weather. Whatever be the case – sweltering heat, an untimely downpour or a gusty wind, a starving stomach, or even a hungry eye will not be deprived of the intense sights, smells and tastes of street food.

Sizzling tikkis. Photo by Jim Elliman
 There is so much passion for roadside food in India, that families and friends make special plans to go out and eat at their favourite cart, just like families plan to go dining at their favourite restaurant. “Nothing can beat the sizzling sounds of that fried tikki or bhature with the irresistible fragrance of stunningly garnished chholas and pickles spiced up with green chillies and onions,” says writer Nitin Pahuja in a post about Delhi’s street food. It may sound like the dieter’s worst nightmare coming true, but foodies will do anything for these spicy treats.
“There was a time when we used to drive all the way from Mumbai to Khopoli for just that one vada pav from a special vendor out there. At that time, there were not as many road side eateries as we have now,” reminisces food lover Ruchir Sheth of his college days, a high, which he is sad that his (spoilt) children will never experience. Those were times when parents were hoodwinked to obtain cars for long rides, speedometers were taken off so that the kilometres were not added, and cars were zoomed off by this group of friends for just one large juicy bite that encompasses the fried spicy potato filling coated with mild chickpea batter, the garlicky powder chutney that added the extra zing, and the humble pav that cut through all the pungency. Now, that, is what we can call capturing the taste.
Any piece where we talk of street food as a delicacy in the cities (well, for some, due to several reasons, it would be staple), would be incomplete without a little mention of the dhabas on highways across the country. When Rocky Singh and Mayur Sharma chronicled their unusual, unexpected and unknown eating at some of the most popular dhabas in a popular national daily, it was as if a food lover’s eyes were gleaming at the prospect of a delicious meal. No wonder, after tasting over 2000 dishes at more than 600 eateries they say “If you take the foods of the world on one side and the foods of India on another, our pile would easily tilt the scales.”

Dinner polished off at a dhaba. The lassi is arriving!
The ubiquitous dhaba is what invites a weary traveller with the promise of a piping hot meal comprising of delectable curries (spice adjusted to order), with a generous dash of oil or butter as a freebie, to be coupled with crisp rotis, brittle papads and raw onions. This to be washed down with the house beverage –  lassi. Of course, the dhaba guys too have learnt to innovate so suit every customer, there is nothing like a hot traditional meal after a long, weary journey. The open air scenario where customers sit on charpoys and wash their hands with water out of a broken jug (again, questionable water) is an experience you can have only in India. Compare it to the box meal you often have to go for on an American highway after a similar journey, and you know that gastronomic bliss can be achieved on in India!

Sunday, July 15, 2012

Pesto Mushroom Chilla with Mango Chutney


When I first heard of really odd combinations as dosa (lentil pancake) stuffing, I was kind of surprised,especially to hear about the meat fillings, since traditionally a dosa is vegetarian! But I had to visit Hampton Chutney in New York to actually understand what works and what does not. This version of my dosa is inspired by Hampton Chutney, although it is not a traditional dosa using urad dal and rice, but it is a traditional Gujarati moong dal chilla, which is a dosa made of green lentils. The chilla is really good for health, especially if eaten with a salad. My mother used to serve it with green chutney and a fresh salad made with onions, tomatoes and fresh coriander.
My earliest memories are those of my mother grinding the soaked lentils and my brother not really liking what was for dinner that evening. Later, Amrita became the chilla queen since she would eat it in some form or the other for at least one meal a day. Finally, I must remember Preethi, who though was difficult to surprise with any kind of dosa since she comes from a part of South India which is dosa land (Bangalore), she fell in love with my chillas. I made her plain chillas with green chutney and yoghurt on her last day in NYC.
More about that later, now, getting on to this chilla.

Pesto Mushroom Chilla with Mango Chutney

Ingredients

For the chilla (makes 3 or 4 chillas)
Green moong dal (the split dal with green skin) - 1 cup, soaked for at least 2 hours, preferably more
Salt - 1/4 teaspoon, adjust to taste
Green chilli paste - 1/4 teaspoon (optional)
Cumin seeds (jeera) - 1 pinch, or roughly about 10-12 seeds, whole

For the stuffing
Sauteing the mushrooms
Mixing the stuffing


Pesto (see notes below) - 1 + 1/2 tablespoon
Mushrooms, cleaned and sliced - 3 or 4, depending on size
Spinach (palak) leaves, washed and roughly chopped - 1/4 cup or a little more
Cheese, grated - 1 + 1/2 Tablespoon
Salt - 1/4 teaspoon, adjust to taste
Black pepper, ground - 1/4 teaspoon
Chutney ingredients ready to be blended

For the chutney
Mango, ripe, peeled and chopped - 1
Salt - 1/4 teaspoon
Sugar - 1/4 teaspoon, optional
Red chilli powder - a slight pinch


Method
1. For the chutney -just blend the ingredients for 20 seconds and you should be done. Taste and adjust spice and seasoning according to your liking. It should ideally be sweet and sour with a slight punch of the chilli, but not spicy.

Batter consistency
2. Drain the soaked dal, and reserve the water for blending the dal. When blending, use the soaked dal with salt and chilli paste adding water one spoon at a time. You want a batter consistency that allows you to spread the pancake easily with a ladle on the pan.

3. For the stuffing - Saute of the mushrooms on a flat pan with a pinch of salt and pepper, about two minutes on each side, till they gain a little colour. You could use a splash of oil, Pam or water as the medium.

4. In a bowl, mix the mushrooms, spinach and cheese with salt and pepper.

5. Now you are ready to make the chilla. Heat a non stick Teflon coated pan on medium heat. Once heated, take it off to spread the chilla. To test whether it is hot, you can splash a little water (from the side please, you do not want to scald yourself!), and if it sizzles, it is hot enough.

6. Use a ladleful of batter on the centre of the pan, and with a circular motion, spread the batter into a chilla. After a minute, spread the pesto on the dosa. After another minute, spread the prepared stuffing, but only on half the chilla. This makes folding and serving it less messy.

Pesto spread on the chilla
The stuffing on one side


Ready to go on the plate
7. Let it cook till the cheese melts. The whole idea of using cheese was to bind the stuffing, otherwise the dry spinach and mushrooms would just fall off. 

8. Once its done, take it off the pan and enjoy it with the chutney!


The perfect meal

 Notes

  • I would have ideally used arugula as the green in the chilla, it goes well with cheese and mushrooms, but spinach was more readily available not only in my fridge, but also in my market.
  • If your batter for the chilla turns out really watery, the trick is to add a little bit of chickpea flour (besan) to thicken it up.
  • You can serve this with any kind of chutney, yoghurt dip or even ketchup.
  • The stuffing would work for a regular dosa as well.
  • I actually did not make pesto to the perfect recipe, it was more like a basil chutney. I do not have the heart to consume as much cheese and olive oil that the pesto recipe asks for. Mine included basil, coriander, nuts (I used raw peanuts, but you can use pine or walnuts), salt, pepper and lime.
  • As I mentioned earlier, the chilla is a very healthy meal, you can substitute for rotis at dinner and have it with dal or vegetables if you are on a diet.
  • You can also use a little bit of left over bhaji from pav bhaji as stuffing. It tastes yum! 
  • Also, you could sprinkle a lit bit of dry pav bhaji masala on a plain chilla while on the pan to lift the flavour of a plain chilla.
  • I could go on and on, but I shall leave you to it!

Thursday, June 21, 2012

Snazzing up the General Motors diet


Much awaited meal!
For a long time (about 10 years) the General Motors Diet has been my go to diet when I want to feel motivated about healthy eating. It is simple, and only seven days in duration, so seems doable. What's more, I enjoy all the foods it prescribes, especially vegetables. The first day is the most difficult for me, it's not that I do not like fruit, but I cannot (and on other days, will not) eat large quantities of sweet fruit at meal times. I just cannot eat that much sweet food. I didn't eat much on the first day, really looking forward to my vegetables day. That night I salivated in my dreams thinking of grilled vegetables and salads.
Mid-morning snack - sauteed mushrooms
with tomato and basil
I started day two as it prescribes - with a baked potato, but I topped it with coriander leaves and seasoning. Since I was super hungry (hadn't eaten much the previous day), I sauteed some mushrooms and tomatoes with salt, pepper and oregano with a touch of fresh basil for a mid-morning snack. I washed it down with a refreshing glass of lime water (no sugar). Lunch was a colourful affair with a huge salad consisting of all the vegetables I could find and love in a basil vinaigrette. I obviously ODed on the basil, I had to finish the packet I bought :D. I do not mind at all, since the flavour is absolutely gorgeous.
Finally, that brought me to the most looked forward meal - dinner! That's because my mind had been obsessing all day about some form of a vegetarian schnitzel after Chef Gary Mehigan cooked his version of a chicken schnitzel on MasterChef Australia. I just wanted to use all those herbs, no matter that I was vegetarian. I figure I could have made it with a tofu and mushroom mixture or even with paneer (cottage cheese) on another day, but today I had to use only vegetables. I settled on a large eggplant (brinjal). I still had a problem. I could not use bread crumbs to coat my schnitzel. I thought of semolina, but then settled on chickpea flour. That was the only part where I cheated on the diet - one tablespoon of chickpea flour, but I think the result was pretty good. 
Well, I still look forward to making something more close to Gary's schnitzel with lovely breadcrumbs and some butter, but here's the diet version!

Eggplant schnitzel version for the GM diet

Ingredients
For the eggplant
Eggplant - 1 large to make large slices
Chickpea flour - 1 to 2 tablespoons
Fresh coriander, chopped - 2 tablespoons
Fresh parsley, chopped - 1 tablespoons
Rosemary (dry, from bottle) - 1 teaspoon
Salt - 1/2 teaspoon for mixture and a small pinch over the eggplants
Pepper - 1/4 teaspoon
Pam spray for the pan (optional)

For the salad
Onion, chopped fine - 1, medium
Tomato, chopped fine - 1, medium
Yellow bell pepper, chopped fine - 2 tablespoons (I used it only for the colour)
Fresh coriander, chopped fine - 2 tablespoons
Cumin powder - 1/4 teaspoon
Rock salt (kala namak) - 1/4 teaspoon
Salt - 1/4 teaspoon
Lemon juice - 1 teaspoon

Method
1. Cut the eggplant lengthwise into half and get three slices about 5 mm thick from the centre portion, to get the largest slices possible.
2. I wasn't sure whether the pan roasting would be enough for cooking the eggplant through, so I sprinkled a  little salt on the slices and cooked them in the microwave for a minute. 
3. Mix the herbs (coriander, parsley, rosemary) and salt and pepper with the dry chickpea four and then add a little water, spoon by spoon, to get a consistency that you can paste on the eggplant. Two or three spoons should do it. Mix it well, and you will need to use your hands!
Still to be cooked on this side
4. Start heating your pan on medium heat, Teflon coated nonstick would be preferable. You can use Pam spray, or a teaspoon of oil, or just a dash of water.
4. Paste the mixture evenly on the one side eggplant slices and lay that side on the hot pan. Paste the remaining mixture on the uncoated side while it is on the pan. When you are pasting the slices on the pan, reduce the heat to minimum, and then restore it to medium again.
5. Allow the slices to cook through on one side (about 3 minutes), and turn it over on the other side. Again, you can choose a dash of Pam, oil or water. Turn off the heat when the second side is cooked.
6. Mix all the ingredients of the salad and plate up if you want, or just dig in. I served it with green coriander chutney on the side. Trust me, after all the anticipation I went through for this dish, I wanted to eat it off the pan!
7. I used a glass of kokum sharbat drink because the sweet and sour taste goes very well with the meal!
All with veggies :)

Tuesday, May 29, 2012

Stir fry, with a little bit of zing

Don't wait to dig in!
No guys, the zing is not coming from garam masala. Just kidding. This was not meant to be a blog post, it was just supposed to be dinner. But when I saw how delicious it looked, I couldn't resist clicking a picture and putting it up here. Stir fry is one of my all time favourites, little surprise, since I am such a big fan of vegetables. I was, however, tired of the limp and dull stir fries that I have been served, some with just a runny soy sauce thrown into the veggies and some just too dry to get me through my portion of rice. 
I like my stir fry to be hearty with taste, and like a little bit of extra sauce. Both Swati and I know it is due to a hangover of our good old dal-chawal, we just cannot do with just dry veggies over our rice. In addition, I am a fan of the sweet sour Asian sauces, so when I found a simple recipe needing a few ingredients that were readily available in my fridge, I was sold. Doesn't matter that the sauce was part of a recipe for meat or sea food mains. I know how to adapt my food :) And then I decided to end the dish with a corn starch mixture to thicken the sauce and add a glossy sheen to the whole dish. Well, I figure since I was eating so many veggies (which is quite healthy) a spoon of corn starch would not do that much harm! The recipe of the sauce mentioned chilli flakes as an ingredient, but it did not sound interesting enough. Being Indian (all Indians will understand this comment), I decided to add a tablespoon of the schezuan sauce that I had left over from the Chinese vada pav. That's what added the zing and just lifted the taste of the boring stir fry!
I draw satisfaction from the fact that I have not used any oil at all in my stir fry, I just used a dash of Pam Cooking Spray to start frying the garlic. After that, most veggies lost water and so no other medium was required. Using a teflon-coated pan helped. You could easily use one teaspoon of oil (whichever you prefer, I am not picky about this, since I tend to use what I have at home at the time). Want to get started?

Veg stir fry with a sweet sour sauce

Ingredients - for two
Mushrooms, sliced - 3-4 medium
Capsicums (bell peppers) - all colours, diced - 1/2 cup
Baby bokchoy, roughly torn - 1 head
Water chestnuts, peeled and sliced - 7-8
Baby corn, sliced - 5-6
Garlic, peeled and sliced - 2-3 cloves
Salt - 1/4 teaspoon
Oil - 1 teaspoon

For the sauce

Soy sauce - 1/4 cup
Vinegar - 3 tablespoons
Brown sugar - 2-3 tablespoons
Schezuan sauce - 1 tablespoon (You can replace it with 1/2 teaspoon of chilli flakes)
Salt - 1/4 teaspoon

For the corn starch mixture

Corn starch - 1 tablespoon
Soy sauce - 1 tablespoon
Water - 1 tablespoon

Brown or white rice to serve

Method

1. Before you start chopping the vegetables, make sure you have washed them well, especially the mushrooms. The ones available in Indian markets are full of dirt. With the bokchoy make sure you have separated each leaf/ stem and cleaned it  through.
2. Heat the oil in a pan, and add the garlic when it sizzles. Alternatively, you can heat the pan and then spray Pam. 
3. When the garlic slices start turning brown in a couple of minutes, add the baby corn and let it fry for 2-3 minutes. Give it a good stir in between. The heat should be on medium or low. Add in the capsicums, and continue stirring. After another two minutes, add the mushrooms, and let it cook another 2 minutes. Finally add the water chestnuts and bokchoy, and let it cook on low heat. Add the salt.
4. In the meanwhile, assemble all the ingredients of the sauce in a bowl. Once the bokchoy starts going limp, add the sauce mixture to the pan and let it cook.
5. Immediately make the corn starch mixture by dissolving the corn starch in the soy sauce and water so that there are no lumps. Add it to the pan when the sauce in the pan starts to bubble. Let the corn starch cook for 2 minutes and turn off the heat.
6. Let the veg stir fry rest in the pan for 7-10 minutes before serving.
8. Serve with white or brown rice. 

Notes:

  • You could add or subtract any vegetables of your choice. Additional vegetables that can be used are spring onions, cabbage, squash and egg plant.
  •  Tofu can be added too, but you will need to shallow/ deep fry it. Add it to the dish at the end, after the sauce is cooked.
  • It can be served with plain cooked noodles as well. 
  • Sorry I do not have pictures of the process, as I said, I had not intended it as a blog post!

Wednesday, May 16, 2012

Hindi-Chini vada bhai

This post has been in my mind for a long time - over a year and a half! Well, finally got around to doing it :)
On his trip back home after a long time in New York, Aditya wanted to dig into a vada pav, but that opportunity had somehow eluded him until the day we were walking down Tardeo Road from Haji Ali. Nestled on a corner near the signal in the AC market area in Mumbai, there is a snack place that has a number of vadas ready and stacked for passers-by to pick up quickly. Not wanting to miss that opportunity, we quickly ordered two. My first clue should have been the spicy Chinese sauce (albeit, an Indian concoction!) that was served as a condiment. Well, the bulb didn't click then. One bite and we were hit by some snazzy schezuan taste. The sauce on the side added oodles of flavour to the whole gastronomic ensemble. All this for a mere seven bucks. We had just sampled the ultimate fusion food - the Chinese vada pav! The two countries may have had innumerable influences on each other, but this definitely must be the most interesting :) It is as good as fusion gets on the streets of Mumbai.
I have been talking about it so much, that everyone at my former office wanted to be treated with the Chinese vada pav. I also wrote a tiny piece for the magazine, Youth Incorporated. Alas, when I went to get some for all of us one monsoon evening, the stall owner told me he had discontinued the item.
Ever since I ate it with Aditya, I wanted to try it out at home. Finally, today was the day! For the recipe of the accompanying schezuan sauce, I turned to India's very own Tarla aunty. I made one batch as per her proportions. Saved the rest for later. I must say, the result was pretty amazing. It was easy to tell, since my brother Mihir came to the kitchen and asked "What's cooking?"
"Chinese vada pav."
"The schezuan smells niiiice..."
Schezuan in the making
Well, that set my mood. Also, I did the non-fried version not only for health purposes, but also because I did not want to heat so much oil and then re-use it later. My appakara vessel to the rescue. It is easily available in any stainless steel vessel store in India, or at Indian stores abroad.
Well, I will not be between you and the wonderful taste of this snack any more. Be happy, the recipe uses minimal oil! Here goes: 

Chinese vada pav

Ingredients (makes about 6-7 vadas)

For the filling

Boiled potatoes - 3-4 medium
Beetroots - 2 tablespoons (grated with a fine cheese grater)
Carrots - 2 tablespoons (grated with a fine cheese grater)
Cabbage - 1 tablespoon (grated with a fine cheese grater)
Spring onions - 1 tablespoon (chopped extremely fine, a bit of green, a bit of white)
Soaking the chillies for the schezuan
Ginger - 1/2 teaspoon (grated with a fine cheese grater)
Salt - 1 teaspoon, then adjust to your taste
Ground pepper powder - 1 teaspoon

Soy sauce - 1 teaspoon
White vinegar - 1 teaspoon
Schezuan sauce - 1 tablespoon (Refer to Tarla Dalal's recipe)
Oil - 1 teaspoon

For the coating

Chickpea flour - 2 tablespoons
Asafoetida (hing) - a tiny pinch
Salt - 1/4 teaspoon, then adjust
Water - 3 tablespoons, to get a batter consistency

Oil to shallow fry - 2-3 tablespoons

To serve

Schezuan sauce
Ketchup (since Indian's eat it with almost anything, but optional)
Pav - 6
Piece of newspaper or cheap paper plate to serve on - A must!


Method

1. Lets tackle the filling first. In a small pan, heat the oil and add the ginger when its hot. Once the ginger sizzles, add the veggies - carrots, beetroots, spring onions and cabbage. Saute for about two minutes and add the schezuan sauce salt, and pepper. Turn off the heat. Allow it to cool for 5-7 minutes.
2. In a mixing bowl, mash the potatoes and add the above mixture and mix well. Make sure that the beetroot red colour spreads across the potatoes and the colour is even.
3. Add the soy sauce and vinegar, and mix well. Be sure to taste, and adjust any flavours to your choice.
4. Once the filling is ready, divide it evenly into 6-7 medium size balls.
Ready to go into the fryer
5. In another small mixing bowl, mix the batter for coating. Take the chikpea flour, add the salt and asafoetida. Then add the water spoon by spoon and mix the batter so that there are no lumps. Make sure you have a smooth batter of a consistency thicker than pancakes or dosa.
6. Heat the appakara vessel, and when hot, put a drop of oil in each of the seven sections. Alternatively, you could deep fry the vadas in hot oil over a medium flame.
7. Dip each ball of the filling in the batter, coat it evenly and then fry (shallow or deep).
Done done done!
8. Be sure to turn your vadas over, and fry until golden brown on each side.
9. Cut the pav from the centre, place the vada in it, and serve it with schezuan sauce on the side.
Dig dig dig in!
10. Wait no more, just devour! Slurrp.
Truly international ;-)

11. Wash it down with a glass of delicious and cold aam panna (raw mango coulis). 


Worth the salt?

You can't do with it being less, you can't do with it being excess. It has to be just right. Until not very long ago, even a foodie, avid food reader and cook like me did not know the purpose of salt in our food. Nor had I ever thought about it or bothered to find out. (Shame on me!) Sure, when questioned, I could come up with the usual. Like it provides the zing, and the seasoning etc, but that was not the real deal, as I found out later. It was when Chefs Kunal Kapoor and Ajay Chopra explained it on one of the episodes of MasterChef India. The role of salt is to bring all the tastes and flavours together, to bind them in the preparation.
Just a pinch!
While reading recipes and experimenting with them, as a cook I was quite used to reading 'Salt to taste' in the ingredients column. Did not even give a second thought to it while writing out my own recipes (check muthiya and salsa rice). Then one day I happened to read this article about a novice cook tearing his hair out since he could not deal with 'salt to taste' in most of the recipes he was referring to. He wrote something to the effect of - "How much is 'to taste'. I have no clue! I don't know where to start, at least give me a start!" Pity, I didn't think of remembering where I read it, so can't link it here. But the guy had a point. Recipe writers cannot and should not assume such knowledge from all the readers, they should be more specific. 
It reminds me of a day when Amrita (a close friend) was upset about something similar. Sitting in her Chicago apartment, she was a learning how to cook something, her mom guiding her from India over the phone. And she got exasperated when directed to 'add water'. "How much? One spoon, one ladle or one cup? Give me a starting point!"
Well, coming back to salt, I have understood my folly, and shall not repeat it. The start was made last night with the grilled portobello salad, and all forthcoming recipes shall have a start point to adding the little white grains. The rest, then, can be adjusted to taste :)

The elusive portobellos…

… well not anymore! As I have mentioned in my profile, we in India are deprived of many ‘foreign’ ingredients, most of them that are thought of as exotic. Until a few years ago, mushrooms were part of that group too. Even today, the mushrooms that are freely available now in every market are the button variety, the others still remaining largely elusive to the common man. What a lovely surprise it was, when yesterday, I noticed a packet of portobellos neatly sitting next to all the other exotic stuff at a vendor's in the local market. Right among the small piles of iceberg lettuce, broccoli, purple cabbage, cherry tomatoes and other things, were two packets staring at me. Skeptical about even asking the cost, I just picked up a packet. Rs 40. Not bad at all ($1 approx = Rs 53). Then I asked the vendor – “Kitne ka?” Rs 30! Yay! I wanted to dance right there, on the footpath (sidewalk), but soon realized that I needed to exercise control.

Since the dinner menu for that day was already decided, my mushrooms had to spend a day in the fridge. There was no way, however, that I was going to wait any longer than required. The dilemma – what should I make? I could stuff them, but my mushrooms were small. Sandwich? Naah, didn’t have the right bread. Considering I had stocked up on the salad ingredients too, it seemed the best option. Grilled portobello salad. My mouth was already watering.

The salad bed - just right!
Well. Dressing? Choices choices. Not that many. Used a bottled vinaigrette, or whip up something. Considering how much I enjoy the latter, there was no question. A bit of soy sauce, a little vinegar, salt and pepper. I was set. No wait, something to cut the acidity (ha ha I can use Masterchef words too :) Since I had no maple syrup, I used honey. Perfect.  
When marinating the mushrooms, I set out to make the bed for my salad. Once again, the exotic ingredient dilemma. I had lettuce – the one variety popular in Indian markets – iceberg. Right or wrong, I had to use it. Salad greens? None. I could use spinach, but wasn’t up to eating spinach tonight. Digging in the vegetable drawer, I found a perfect solution (well, at least for me!) Cucumber. Just peeled ribbons length wise, leaving the dark green skin on. Into the freezer to chill and provide crunch.
Sizzle sizzle
The 'Masterchef deglaze'
By then, I started grilling the mushrooms. (I saved the remnants of the marinade to use at a dressing over my salad. I used a simple grill pan on a stove top. A slight dash of olive oil. Yumm! Once my mushrooms were done, I realized that there was too much taste that was stuck on the pan, and all those episodes of Masterchef where they talk of ‘deglazing the pan’ came running back to my mind. My heart, nay, my taste buds, would not allow me to waste that! So I just threw in the  tomatoes (they were supposed to go in raw in the salad) and let them grill in the juices. After taking them off and setting them to cool, the Indian in me could not resist sprinkling a pinch of dried oregano over the tomatoes. Trust me, it went well with the whole dish! (I guess mixed herbs would do just as well.)

Not one to waste any bit of the taste, I even toasted my bread on the same pan. A light grill on each side. All I needed was a bit of assembly, and then dig in! Simple delicious. I can’t wait to chance upon a packet of shiitakes now!


Grilled Portobello Salad

Ingredients

Cooling off. Notice the 'Indianness'
- oregano on the tomatoes
Portobello mushrooms – 5-6 medium size
Tomatoes – 1 large
Iceberg lettuce (or any other you like) – 2-3 leaves
Cucumber – 1 large (you could substitute it with salad greens
Salt – a pinch
Crushed black pepper – a pinch
Olive oil – 1 teaspoon
Brown bread – 2 slices

For the dressing/ marinade

Salt – 1 teaspoon
Crushed black pepper – 1 teaspoon
Soy sauce – 2 tablespoons
Vinegar (you could use any you like) – 1 tablespoon
Honey – 1 teaspoon


Method
1. Stem the mushrooms and thoroughly wash them.
2. Mix the marinade ingredients in a bowl and put in the mushrooms. Let them marinate for 20 minutes.
3. Wash the lettuce and chop it roughly to make a bed on your plate. Peel ribbons or strips of the cucumber to sit in the middle of the plate to make a bed for the mushrooms. Stick it in the freezer to chill.
4. Heat your grill pan, and grease it with a little bit of olive oil. Place the mushrooms on it to leave them to grill. Don’t forget to take in the aromas while they sizzle away. Season them on the pan, if need be. And turn them over to do the other side as well.
5. Chop the tomatoes in 1 cm cubes, while the mushrooms are on the grill.
6. Once the mushrooms are done on both sides, take them off pan, and throw in the tomatoes. Take them off when they are slightly charred and have absorbed all the juices. Don’t turn off the heat yet. Place the bread slices (halved into triangles). Grill until brown on both sides.
Pretty, ain't it
7. Now, assemble. Take out the salad bed from the freezer. You will need to season the lettuce and cucumber on the plate itself. Sprinkle a bit of pepper is you want. At this point, you could grate a small piece of ginger over it if you want. (I didn’t, since I thought of it only while I’m writing this!) Drizzle 1 tablespoon of dressing over it. Lay the tomatoes on one side. Slice the mushrooms and lay them on top of the cucumber bed. And place the toast on the side. Then? Do not wait one more minute. Just devour it!
The perfect bite

Notes:

I do feel that I should have used fresh lemon instead of vinegar. It would be refreshing in a summer salad. Well, there's always next time!