Pages

Tuesday, May 29, 2012

Stir fry, with a little bit of zing

Don't wait to dig in!
No guys, the zing is not coming from garam masala. Just kidding. This was not meant to be a blog post, it was just supposed to be dinner. But when I saw how delicious it looked, I couldn't resist clicking a picture and putting it up here. Stir fry is one of my all time favourites, little surprise, since I am such a big fan of vegetables. I was, however, tired of the limp and dull stir fries that I have been served, some with just a runny soy sauce thrown into the veggies and some just too dry to get me through my portion of rice. 
I like my stir fry to be hearty with taste, and like a little bit of extra sauce. Both Swati and I know it is due to a hangover of our good old dal-chawal, we just cannot do with just dry veggies over our rice. In addition, I am a fan of the sweet sour Asian sauces, so when I found a simple recipe needing a few ingredients that were readily available in my fridge, I was sold. Doesn't matter that the sauce was part of a recipe for meat or sea food mains. I know how to adapt my food :) And then I decided to end the dish with a corn starch mixture to thicken the sauce and add a glossy sheen to the whole dish. Well, I figure since I was eating so many veggies (which is quite healthy) a spoon of corn starch would not do that much harm! The recipe of the sauce mentioned chilli flakes as an ingredient, but it did not sound interesting enough. Being Indian (all Indians will understand this comment), I decided to add a tablespoon of the schezuan sauce that I had left over from the Chinese vada pav. That's what added the zing and just lifted the taste of the boring stir fry!
I draw satisfaction from the fact that I have not used any oil at all in my stir fry, I just used a dash of Pam Cooking Spray to start frying the garlic. After that, most veggies lost water and so no other medium was required. Using a teflon-coated pan helped. You could easily use one teaspoon of oil (whichever you prefer, I am not picky about this, since I tend to use what I have at home at the time). Want to get started?

Veg stir fry with a sweet sour sauce

Ingredients - for two
Mushrooms, sliced - 3-4 medium
Capsicums (bell peppers) - all colours, diced - 1/2 cup
Baby bokchoy, roughly torn - 1 head
Water chestnuts, peeled and sliced - 7-8
Baby corn, sliced - 5-6
Garlic, peeled and sliced - 2-3 cloves
Salt - 1/4 teaspoon
Oil - 1 teaspoon

For the sauce

Soy sauce - 1/4 cup
Vinegar - 3 tablespoons
Brown sugar - 2-3 tablespoons
Schezuan sauce - 1 tablespoon (You can replace it with 1/2 teaspoon of chilli flakes)
Salt - 1/4 teaspoon

For the corn starch mixture

Corn starch - 1 tablespoon
Soy sauce - 1 tablespoon
Water - 1 tablespoon

Brown or white rice to serve

Method

1. Before you start chopping the vegetables, make sure you have washed them well, especially the mushrooms. The ones available in Indian markets are full of dirt. With the bokchoy make sure you have separated each leaf/ stem and cleaned it  through.
2. Heat the oil in a pan, and add the garlic when it sizzles. Alternatively, you can heat the pan and then spray Pam. 
3. When the garlic slices start turning brown in a couple of minutes, add the baby corn and let it fry for 2-3 minutes. Give it a good stir in between. The heat should be on medium or low. Add in the capsicums, and continue stirring. After another two minutes, add the mushrooms, and let it cook another 2 minutes. Finally add the water chestnuts and bokchoy, and let it cook on low heat. Add the salt.
4. In the meanwhile, assemble all the ingredients of the sauce in a bowl. Once the bokchoy starts going limp, add the sauce mixture to the pan and let it cook.
5. Immediately make the corn starch mixture by dissolving the corn starch in the soy sauce and water so that there are no lumps. Add it to the pan when the sauce in the pan starts to bubble. Let the corn starch cook for 2 minutes and turn off the heat.
6. Let the veg stir fry rest in the pan for 7-10 minutes before serving.
8. Serve with white or brown rice. 

Notes:

  • You could add or subtract any vegetables of your choice. Additional vegetables that can be used are spring onions, cabbage, squash and egg plant.
  •  Tofu can be added too, but you will need to shallow/ deep fry it. Add it to the dish at the end, after the sauce is cooked.
  • It can be served with plain cooked noodles as well. 
  • Sorry I do not have pictures of the process, as I said, I had not intended it as a blog post!

Wednesday, May 16, 2012

Hindi-Chini vada bhai

This post has been in my mind for a long time - over a year and a half! Well, finally got around to doing it :)
On his trip back home after a long time in New York, Aditya wanted to dig into a vada pav, but that opportunity had somehow eluded him until the day we were walking down Tardeo Road from Haji Ali. Nestled on a corner near the signal in the AC market area in Mumbai, there is a snack place that has a number of vadas ready and stacked for passers-by to pick up quickly. Not wanting to miss that opportunity, we quickly ordered two. My first clue should have been the spicy Chinese sauce (albeit, an Indian concoction!) that was served as a condiment. Well, the bulb didn't click then. One bite and we were hit by some snazzy schezuan taste. The sauce on the side added oodles of flavour to the whole gastronomic ensemble. All this for a mere seven bucks. We had just sampled the ultimate fusion food - the Chinese vada pav! The two countries may have had innumerable influences on each other, but this definitely must be the most interesting :) It is as good as fusion gets on the streets of Mumbai.
I have been talking about it so much, that everyone at my former office wanted to be treated with the Chinese vada pav. I also wrote a tiny piece for the magazine, Youth Incorporated. Alas, when I went to get some for all of us one monsoon evening, the stall owner told me he had discontinued the item.
Ever since I ate it with Aditya, I wanted to try it out at home. Finally, today was the day! For the recipe of the accompanying schezuan sauce, I turned to India's very own Tarla aunty. I made one batch as per her proportions. Saved the rest for later. I must say, the result was pretty amazing. It was easy to tell, since my brother Mihir came to the kitchen and asked "What's cooking?"
"Chinese vada pav."
"The schezuan smells niiiice..."
Schezuan in the making
Well, that set my mood. Also, I did the non-fried version not only for health purposes, but also because I did not want to heat so much oil and then re-use it later. My appakara vessel to the rescue. It is easily available in any stainless steel vessel store in India, or at Indian stores abroad.
Well, I will not be between you and the wonderful taste of this snack any more. Be happy, the recipe uses minimal oil! Here goes: 

Chinese vada pav

Ingredients (makes about 6-7 vadas)

For the filling

Boiled potatoes - 3-4 medium
Beetroots - 2 tablespoons (grated with a fine cheese grater)
Carrots - 2 tablespoons (grated with a fine cheese grater)
Cabbage - 1 tablespoon (grated with a fine cheese grater)
Spring onions - 1 tablespoon (chopped extremely fine, a bit of green, a bit of white)
Soaking the chillies for the schezuan
Ginger - 1/2 teaspoon (grated with a fine cheese grater)
Salt - 1 teaspoon, then adjust to your taste
Ground pepper powder - 1 teaspoon

Soy sauce - 1 teaspoon
White vinegar - 1 teaspoon
Schezuan sauce - 1 tablespoon (Refer to Tarla Dalal's recipe)
Oil - 1 teaspoon

For the coating

Chickpea flour - 2 tablespoons
Asafoetida (hing) - a tiny pinch
Salt - 1/4 teaspoon, then adjust
Water - 3 tablespoons, to get a batter consistency

Oil to shallow fry - 2-3 tablespoons

To serve

Schezuan sauce
Ketchup (since Indian's eat it with almost anything, but optional)
Pav - 6
Piece of newspaper or cheap paper plate to serve on - A must!


Method

1. Lets tackle the filling first. In a small pan, heat the oil and add the ginger when its hot. Once the ginger sizzles, add the veggies - carrots, beetroots, spring onions and cabbage. Saute for about two minutes and add the schezuan sauce salt, and pepper. Turn off the heat. Allow it to cool for 5-7 minutes.
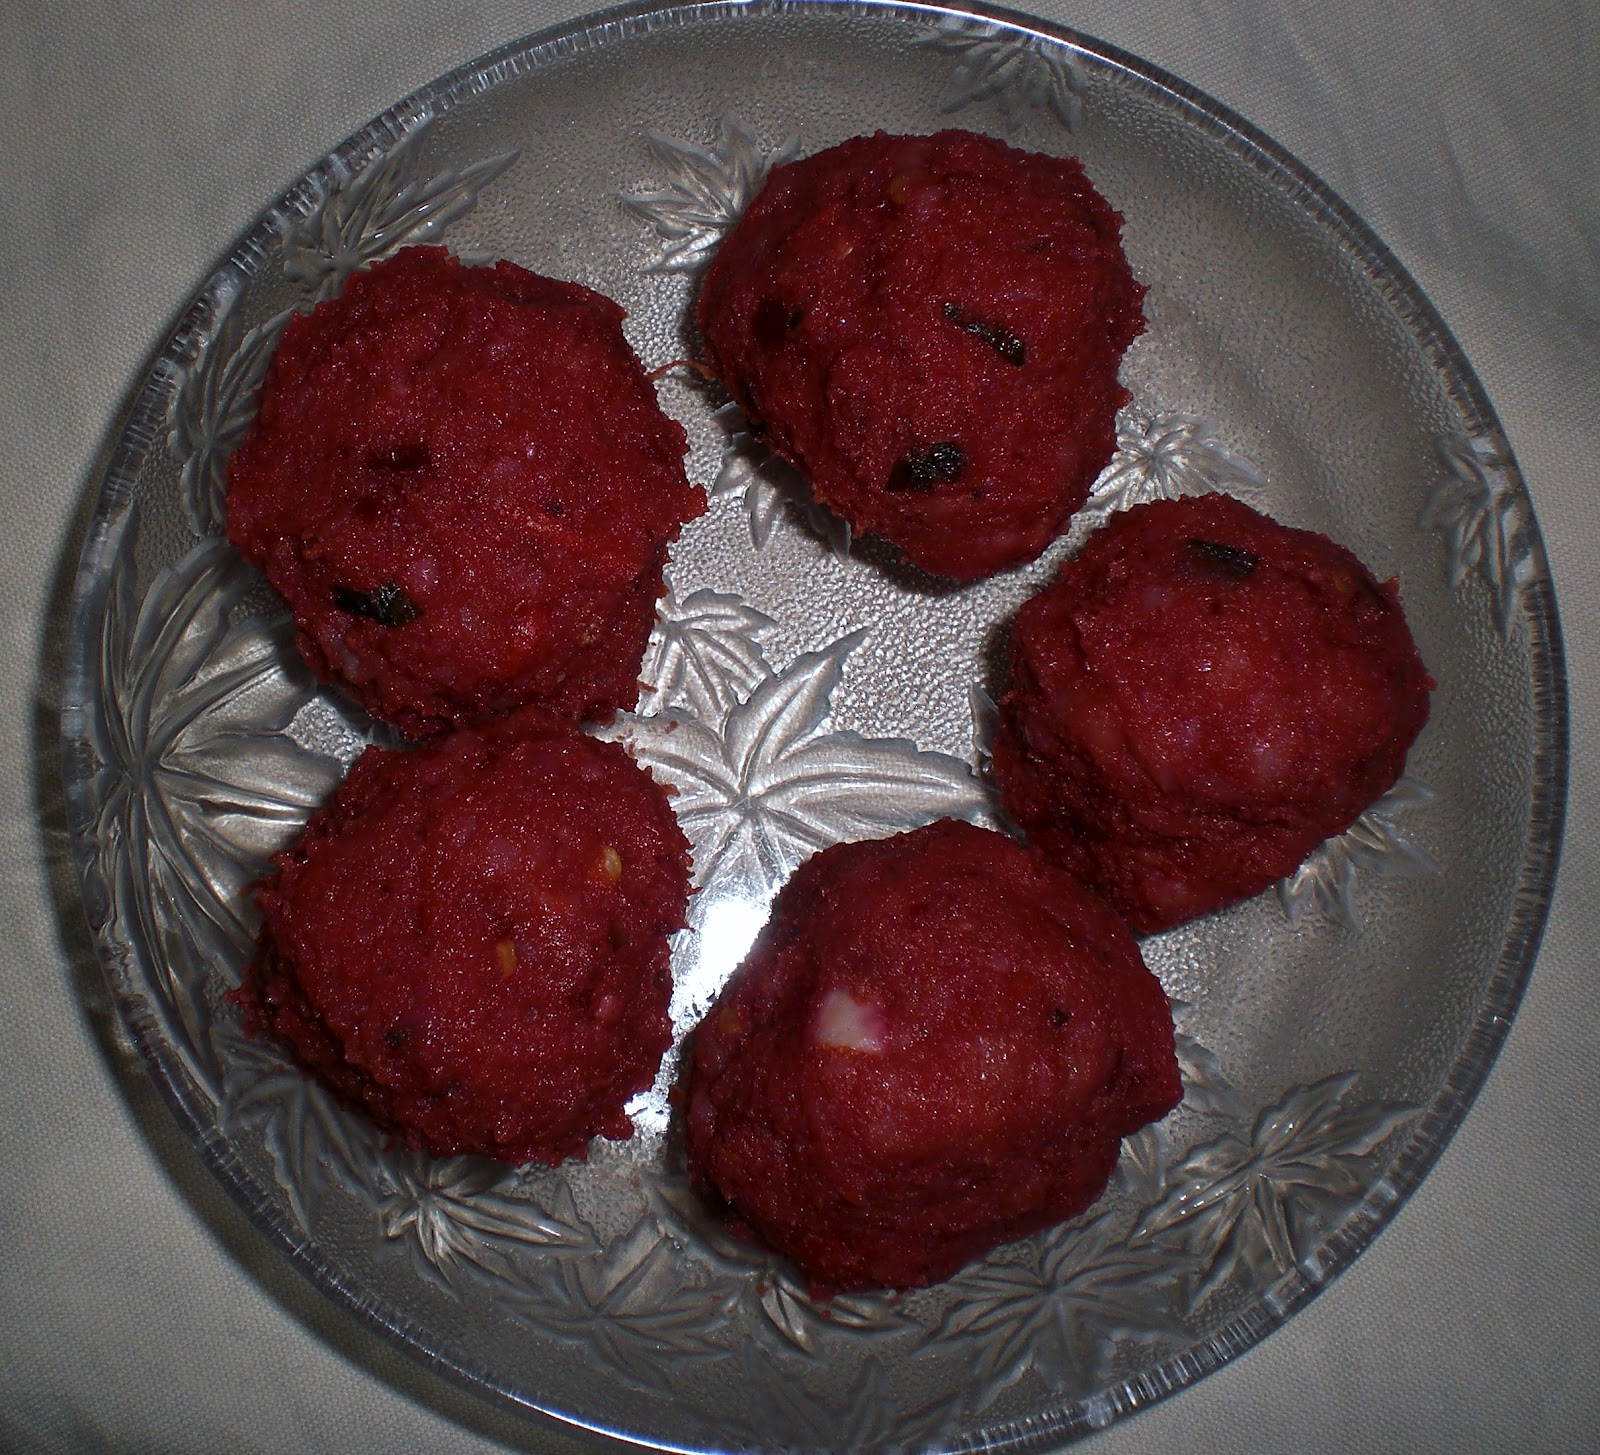
2. In a mixing bowl, mash the potatoes and add the above mixture and mix well. Make sure that the beetroot red colour spreads across the potatoes and the colour is even.
3. Add the soy sauce and vinegar, and mix well. Be sure to taste, and adjust any flavours to your choice.
4. Once the filling is ready, divide it evenly into 6-7 medium size balls.
Ready to go into the fryer
5. In another small mixing bowl, mix the batter for coating. Take the chikpea flour, add the salt and asafoetida. Then add the water spoon by spoon and mix the batter so that there are no lumps. Make sure you have a smooth batter of a consistency thicker than pancakes or dosa.
6. Heat the appakara vessel, and when hot, put a drop of oil in each of the seven sections. Alternatively, you could deep fry the vadas in hot oil over a medium flame.
7. Dip each ball of the filling in the batter, coat it evenly and then fry (shallow or deep).
Done done done!
8. Be sure to turn your vadas over, and fry until golden brown on each side.
9. Cut the pav from the centre, place the vada in it, and serve it with schezuan sauce on the side.
Dig dig dig in!
10. Wait no more, just devour! Slurrp.
Truly international ;-)

11. Wash it down with a glass of delicious and cold aam panna (raw mango coulis). 


Worth the salt?

You can't do with it being less, you can't do with it being excess. It has to be just right. Until not very long ago, even a foodie, avid food reader and cook like me did not know the purpose of salt in our food. Nor had I ever thought about it or bothered to find out. (Shame on me!) Sure, when questioned, I could come up with the usual. Like it provides the zing, and the seasoning etc, but that was not the real deal, as I found out later. It was when Chefs Kunal Kapoor and Ajay Chopra explained it on one of the episodes of MasterChef India. The role of salt is to bring all the tastes and flavours together, to bind them in the preparation.
Just a pinch!
While reading recipes and experimenting with them, as a cook I was quite used to reading 'Salt to taste' in the ingredients column. Did not even give a second thought to it while writing out my own recipes (check muthiya and salsa rice). Then one day I happened to read this article about a novice cook tearing his hair out since he could not deal with 'salt to taste' in most of the recipes he was referring to. He wrote something to the effect of - "How much is 'to taste'. I have no clue! I don't know where to start, at least give me a start!" Pity, I didn't think of remembering where I read it, so can't link it here. But the guy had a point. Recipe writers cannot and should not assume such knowledge from all the readers, they should be more specific. 
It reminds me of a day when Amrita (a close friend) was upset about something similar. Sitting in her Chicago apartment, she was a learning how to cook something, her mom guiding her from India over the phone. And she got exasperated when directed to 'add water'. "How much? One spoon, one ladle or one cup? Give me a starting point!"
Well, coming back to salt, I have understood my folly, and shall not repeat it. The start was made last night with the grilled portobello salad, and all forthcoming recipes shall have a start point to adding the little white grains. The rest, then, can be adjusted to taste :)

The elusive portobellos…

… well not anymore! As I have mentioned in my profile, we in India are deprived of many ‘foreign’ ingredients, most of them that are thought of as exotic. Until a few years ago, mushrooms were part of that group too. Even today, the mushrooms that are freely available now in every market are the button variety, the others still remaining largely elusive to the common man. What a lovely surprise it was, when yesterday, I noticed a packet of portobellos neatly sitting next to all the other exotic stuff at a vendor's in the local market. Right among the small piles of iceberg lettuce, broccoli, purple cabbage, cherry tomatoes and other things, were two packets staring at me. Skeptical about even asking the cost, I just picked up a packet. Rs 40. Not bad at all ($1 approx = Rs 53). Then I asked the vendor – “Kitne ka?” Rs 30! Yay! I wanted to dance right there, on the footpath (sidewalk), but soon realized that I needed to exercise control.

Since the dinner menu for that day was already decided, my mushrooms had to spend a day in the fridge. There was no way, however, that I was going to wait any longer than required. The dilemma – what should I make? I could stuff them, but my mushrooms were small. Sandwich? Naah, didn’t have the right bread. Considering I had stocked up on the salad ingredients too, it seemed the best option. Grilled portobello salad. My mouth was already watering.

The salad bed - just right!
Well. Dressing? Choices choices. Not that many. Used a bottled vinaigrette, or whip up something. Considering how much I enjoy the latter, there was no question. A bit of soy sauce, a little vinegar, salt and pepper. I was set. No wait, something to cut the acidity (ha ha I can use Masterchef words too :) Since I had no maple syrup, I used honey. Perfect.  
When marinating the mushrooms, I set out to make the bed for my salad. Once again, the exotic ingredient dilemma. I had lettuce – the one variety popular in Indian markets – iceberg. Right or wrong, I had to use it. Salad greens? None. I could use spinach, but wasn’t up to eating spinach tonight. Digging in the vegetable drawer, I found a perfect solution (well, at least for me!) Cucumber. Just peeled ribbons length wise, leaving the dark green skin on. Into the freezer to chill and provide crunch.
Sizzle sizzle
The 'Masterchef deglaze'
By then, I started grilling the mushrooms. (I saved the remnants of the marinade to use at a dressing over my salad. I used a simple grill pan on a stove top. A slight dash of olive oil. Yumm! Once my mushrooms were done, I realized that there was too much taste that was stuck on the pan, and all those episodes of Masterchef where they talk of ‘deglazing the pan’ came running back to my mind. My heart, nay, my taste buds, would not allow me to waste that! So I just threw in the  tomatoes (they were supposed to go in raw in the salad) and let them grill in the juices. After taking them off and setting them to cool, the Indian in me could not resist sprinkling a pinch of dried oregano over the tomatoes. Trust me, it went well with the whole dish! (I guess mixed herbs would do just as well.)

Not one to waste any bit of the taste, I even toasted my bread on the same pan. A light grill on each side. All I needed was a bit of assembly, and then dig in! Simple delicious. I can’t wait to chance upon a packet of shiitakes now!


Grilled Portobello Salad

Ingredients

Cooling off. Notice the 'Indianness'
- oregano on the tomatoes
Portobello mushrooms – 5-6 medium size
Tomatoes – 1 large
Iceberg lettuce (or any other you like) – 2-3 leaves
Cucumber – 1 large (you could substitute it with salad greens
Salt – a pinch
Crushed black pepper – a pinch
Olive oil – 1 teaspoon
Brown bread – 2 slices

For the dressing/ marinade

Salt – 1 teaspoon
Crushed black pepper – 1 teaspoon
Soy sauce – 2 tablespoons
Vinegar (you could use any you like) – 1 tablespoon
Honey – 1 teaspoon


Method
1. Stem the mushrooms and thoroughly wash them.
2. Mix the marinade ingredients in a bowl and put in the mushrooms. Let them marinate for 20 minutes.
3. Wash the lettuce and chop it roughly to make a bed on your plate. Peel ribbons or strips of the cucumber to sit in the middle of the plate to make a bed for the mushrooms. Stick it in the freezer to chill.
4. Heat your grill pan, and grease it with a little bit of olive oil. Place the mushrooms on it to leave them to grill. Don’t forget to take in the aromas while they sizzle away. Season them on the pan, if need be. And turn them over to do the other side as well.
5. Chop the tomatoes in 1 cm cubes, while the mushrooms are on the grill.
6. Once the mushrooms are done on both sides, take them off pan, and throw in the tomatoes. Take them off when they are slightly charred and have absorbed all the juices. Don’t turn off the heat yet. Place the bread slices (halved into triangles). Grill until brown on both sides.
Pretty, ain't it
7. Now, assemble. Take out the salad bed from the freezer. You will need to season the lettuce and cucumber on the plate itself. Sprinkle a bit of pepper is you want. At this point, you could grate a small piece of ginger over it if you want. (I didn’t, since I thought of it only while I’m writing this!) Drizzle 1 tablespoon of dressing over it. Lay the tomatoes on one side. Slice the mushrooms and lay them on top of the cucumber bed. And place the toast on the side. Then? Do not wait one more minute. Just devour it!
The perfect bite

Notes:

I do feel that I should have used fresh lemon instead of vinegar. It would be refreshing in a summer salad. Well, there's always next time!

Wednesday, November 9, 2011

Salsa up the rice!

It’s been a long time away (the long should read loooooong with at least 50 Os). All due to the fact that I had some preconceived notions about what my next few posts should be or what kind of pictures I wanted to go with my posts, and I kept imagining shoots that I could not have accomplished in my home kitchen. As you can see, none of it happened. Well, today it ends. Ends with a simple yet very tasty dish (eight people in office cannot lie at the same time!) And yes, let alone ‘awesome’ pictures, I do not have any pictures to go with this post!
As usual, one day, I was toying with the idea of providing a great end to a bowl of some leftover rice in the refrigerator… I was thinking something new, and yes, masaaledar. My eyes fell on the bottle of salsa sauce resting on some inner corner of my refrigerator ever since I bought it, mistaking it for pizza sauce (ok ok, in my own haste, didn’t check the bottle before purchasing it.) The idea was quick to hit. The process simple, and fast, the result, delicious. Try it for yourself.

Ingredients
Leftover cold rice – as much as you have (or want to try out!)
Spring onions/ scallions (including white or green) – 1 for every 2 cups of rice
Tomatoes – ½ for every 2 cups of rice
Green capsicum (bell pepper) – ½ for every 2 cups of rice
Coriander (cilantro) – a few springs
Salsa from a bottle – 3 tablespoons for every two cups, or more, to your taste
Salt – to taste
Garlic paste, sauce, or in any form – ½ teaspoon or to your taste
Oil – 1 tsp

Method:
  1. Chop all your veggies finely, including the coriander.
  2. Heat the oil in a pan or wok. Once hot, add the garlic, onions and capsicum.
  3. Stir for about two minutes or so and add the tomatoes.
  4. After two more minutes, add the rice and mix.
  5. Add the salsa, mix to a very slight liquidy consistency and taste for salt. Add as much as you need.
  6. Add some of the coriander and mix it for taste and use some as garnish.
  7. Wait no more, just dig in!

Notes:

  • As usual measurements are indicative; you can use them to your taste.
  • You can use plain onions if you do not have spring onions.
  • If you want it slightly spicy, you can add red chilli powder to your taste while stirring the onions.

Thursday, January 20, 2011

My most liked food - muthiya

Whatever be the case, my first post had to be about muthiya. Though there may be many recipes available easily off Google, this one is for a few people I cherish, who absolutely love the dish....Did I say absolutely? I mean to craziness... Amrita at one point nicknamed me muthiya rani and Swati claimed her 'one pound of muthiya' when she visited Mumbai in December 2010.

Somehow, this reminds me of the old days at the Times of India when we often did potlucks and when it was my turn to say what I'd be getting, I was given no choice! It had to be muthiya. That said, I want to establish that I have become a little tired of eating it... love to cook it though.

It is basically a Gujarati recipe devised to take care of left over rice, but over the years it has become so popular that numerous variations of the same are tried and tasted, and loved all over the world... and since it is basically a steamed dish, it can I guess fall under the category of 'low fat' or 'health' food :)

Now, getting to the point:


The recipe
Ingredients (measurements are indicative only, you can vary them a bit according to taste):

For the muthiya:
Boiled rice - 1 cup
Chickpea flour (besan)- 2 tablespoons
Whole wheat flour (atta) - 1 to 1.5 cups
Grated cabbage - 1 cup
Salt - to taste
Sugar - 1 tablespoon
Green chilli paste/ sauce OR red chilli powder – 1 teaspoon (optional)
Lemon juice – 2 tablespoons
Baking soda - 1 pinch
Oil – 2 teaspoons

For the garnish:
Oil – 1 teaspoon
Mustard seeds – a pinch
Cumin seeds – a pinch
Finely chopped coriander (cilantro) – 1 tablespoon
Grated coconut (fresh or frozen) – 1 tablespoon

Method

1. Start your steamer, so that the water is ready to with the dough. Ideally, it is a perforated plate (thali) placed on a stand in a large vessel filled with water. You can also use your steamer in an electric rice cooker, over water.
2. In a mix bowl, put in all the ingredients except the flours. Mix well.
3. Add the chickpea flour, mix and at first add only once cup of the whole wheat flour. Mix and start binding to a soft but firm dough. If it is a bit runny, add more flour. On the other hand, if it becomes too hard, use a splash of water to soften it.
4. Grease your palms with a bit of oil and roll the dough into small cylindrical shapes, as large as can fit in your steamer.
5. Steam for around 20 minutes. After 10 minutes, check that the steamer has not run out of water or refill it, otherwise your muthiyas will burn. After 20 minutes poke in a knife and if it comes out clean, the muthiyas are done. If not, steam for a minute or two more.
6. Once done, let the cylindrical rolls cool down, and slice into small pieces. Arrange in the serving plate.
7. For the garnish, heat the oil in a very small pan and throw in the mustard seeds. Once they pop, throw in the cumin seeds and turn off the heat. Spread this garnish evenly on the muthiyas. Sprinkle the coriander and the grated coconut and the dish is ready to serve.

Notes:

* Grated squash (dudhi) can also be used instead of the cabbage. Other leafy vegetables that can be used are methi and spinach (palak).
* The proportion of the two flours can vary. In fact, you can do away with the chickpea flour, if you don't have any and use only whole wheat flour.
* Any kind of cooked rice can be used… the type of grain does not matter. Even brown rice can be used.
* It is not necessary to have rice in the recipe… it can be cooked without the rice, though it’ll be much softer with the rice.
* For fat free options, skip the oil in the muthiya dough and skip the garnish.
* Finely chopped coriander (1 tablespoon) can be added to the muthiya dough as well.

Why Ethnic Eats?

Ever since I have started appreciating food, I have always been faced with ethnic labels... the most popular in India being 'South Indian' and 'Punjabi'. Of course, with time many more were added, and the ethnic influences in food increased exponentially. No where but in India will you find Chinese bhel or Chinese idli... and no one but an Indian will add loads of spice to the food, be it chilli sauce, chilli powder or chutney. The spice is added no matter what the food, be it a delicate soup, salad, curry, rice... or even noodles!

In a recent experience in an upscale Ahmedabad restaurant, my excitement knew no bounds after I read the elaborate menu and looked up the description of a few Mexican dishes. By then, I had missed the cuisine so much after my return from New York, that after reading the precise description and ingredients, I chose to order the portobello fajitas. Just to make sure, I even asked the captain for a description, and that too fit the bill. Imagine my utter surprise, that when my dish was served, it consisted of a cut-up roasted roomali roti with what I can at best describe as a paneer jal frezie! There was no trace of any kind of mushrooms, let alone any Mexican flavours. My friend Eisha who was with me, had warned me about the Gujarati influence on food she said it goes to the extent of even pasta in Gujarat being sweet...but even with that warning, I was surprised.

Whether it is ketchup on noodles or mango and coriander (cilantro) chutneys on a bagel, across the globe, food is ever evolving, with new combinations, tastes and flavours. And I want to make the most of these ethnic influences even when I so much as think about cooking.

The first samplers of food at Ethnic Eats were Swati and Aditya, where the menu consisted of a universal soup, a Greek salad, Mediterranean appetizers, an Italian main course and an Indian dessert, all set in New York. Not to mention that all the recipes I had were altered, whether to keep in mind the preferences of the guests, the use of the ingredients and availability of time. The term Ethnic Eats was used by me in early 2010, but at that point it was just a one time thing. Now, I am here to stay!
So, let's cook... and eat :)